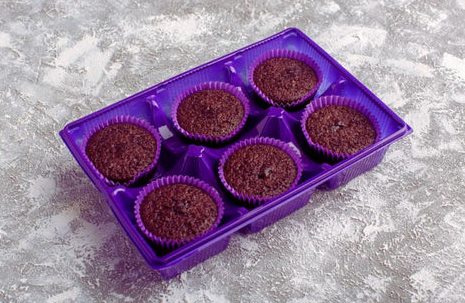
If you’re someone who loves the rich, velvety taste of chocolate and enjoys experimenting in the kitchen, making layered chocolates is a fantastic way to indulge in your passion. Chocolate molds open up a world of possibilities, allowing you to create stunning multi-flavor treats that not only look impressive but also taste divine. In this blog, we will dive into how you can use chocolate molds to create layered chocolates with different flavors, textures, and colors. Whether you’re a beginner or an experienced chocolatier, this guide will provide you with simple yet effective techniques to elevate your chocolate game.
Why Use Chocolate Molds for Layered Chocolates?
Before we jump into the recipes, let’s explore why chocolate molds are an essential tool for creating beautiful layered chocolates. Molds come in various shapes, sizes, and designs, making them incredibly versatile. They allow you to control the appearance and texture of the chocolate layers, which is key to crafting professional-looking chocolates at home.
Here are some reasons why chocolate molds are a must-have:
- Consistency: Molds provide uniformity in shape and size, ensuring each chocolate layer is perfectly even.
- Design Flexibility: With so many mold options available, you can experiment with different designs, from simple squares to intricate, themed shapes.
- Easy to Use: Chocolate molds are easy to work with, making them ideal for beginners.
- Reusable: Most molds are durable and can be used over and over again, making them a great investment for any home chocolatier.
You can find a wide selection of chocolate molds at PJ Bold, perfect for creating your next batch of layered chocolates. Visit Collection of Chocolate Molds to start your chocolaty journey today!
Essential Ingredients for Layered Chocolates
Making layered chocolates requires a few key ingredients. Here’s what you need:
- Chocolate: The base of any good chocolate recipe! Use high-quality chocolate to ensure a rich and smooth flavor. You can choose from dark, milk, or white chocolate, or even get creative with flavored chocolates like mint, raspberry, or caramel.
- Flavorings: Add extra taste dimensions with flavors such as vanilla, orange zest, or coffee. These can complement the chocolate or provide a surprising twist.
- Fillings: Consider adding fillings like caramel, nuts, or fruit preserves between the layers to create texture and depth.
- Colorants: If you want to add a pop of color to your layered chocolates, edible food coloring can be a great choice for creating vibrant layers.
Step-by-Step Guide to Making Layered Chocolates with Chocolate Molds
Now that you have your ingredients ready, let’s dive into the process of making layered chocolates using chocolate molds.
1. Preparing the Molds
Before you begin, ensure that your chocolate molds are clean and dry. Any moisture in the mold can cause the chocolate to seize up, so wipe them gently with a dry cloth. If you’re using more than one layer of chocolate, make sure to choose molds that can accommodate multiple layers.
2. Melting the Chocolate
The first step in creating your layered chocolates is melting the chocolate. Here are two popular methods for melting chocolate:
- Double Boiler Method: Place your chocolate in a heatproof bowl over a pot of simmering water, stirring occasionally until it’s completely melted.
- Microwave Method: Place the chocolate in a microwave-safe bowl and heat it in 20-second intervals, stirring between each, until it’s smooth and melted.
Once the chocolate is melted, you can add any flavorings or colorants to customize your layers.
3. Pouring the First Layer
Start by pouring your first layer of melted chocolate into the mold. Be sure to fill each cavity completely, but not too high. Tap the mold gently on the countertop to remove any air bubbles and ensure an even layer. Let this layer set for about 10 to 15 minutes until it hardens.
4. Adding Fillings (Optional)
If you’re incorporating a filling, such as caramel or nuts, now’s the time to add it. Place a small amount of filling in the center of each chocolate cavity, being careful not to overflow the edges.
5. Pouring the Second Layer
Once the first layer has set, repeat the melting process for your second layer of chocolate. This layer can be a different flavor or color for contrast. Pour it over the first layer, covering the filling if you’ve added one. Tap the mold again to ensure an even layer and to eliminate any air pockets.
6. Letting the Chocolates Set
After pouring the second layer, let the chocolates set for another 15 to 20 minutes. You can speed up the process by placing the mold in the fridge or freezer, but be careful not to freeze the chocolates, as it can cause cracking.
7. Removing the Chocolates from the Mold
Once your layered chocolates have fully set, carefully pop them out of the chocolate molds. If you’ve used a flexible mold, gently press on the bottom to release the chocolates.
Creative Ideas for Layered Chocolates
Now that you know the basic process, here are a few creative ideas for your layered chocolates:
- Trio of Flavors: Create a three-layered chocolate using milk, dark, and white chocolate. You can add flavorings like mint or orange zest to each layer for extra variety.
- Caramel and Nut Layers: Add a layer of smooth caramel or a nut butter filling between two layers of chocolate. The crunchy texture contrasts beautifully with the creamy chocolate.
- Fruit and Chocolate Fusion: Add fruit preserves, such as raspberry or strawberry, between two layers of dark chocolate. The tartness of the fruit pairs wonderfully with the richness of the chocolate.
Tips and Recommendations
- Tempering the Chocolate: For a glossy finish and smooth texture, tempering your chocolate before using it in the molds is highly recommended. This process helps the chocolate set perfectly without any streaks or dullness.
- Experiment with Different Flavors: Don’t be afraid to get creative! Add spices like cinnamon, chili, or even coffee to your chocolate layers for a unique flavor experience.
- Avoid Overheating: When melting your chocolate, be careful not to overheat it, as this can cause it to seize. Always melt it slowly and gently.
For more chocolate mold recipes, don’t forget to check out this helpful blog: How to Make Chocolate-Covered Oreos in a Mold?
Conclusion
Making layered chocolates using chocolate molds is a fun and rewarding activity that anyone can enjoy. Whether you’re creating chocolates for a special occasion or just because, these multi-flavor treats are sure to impress. With a little creativity and the right tools, you can craft beautiful and delicious chocolates that taste as good as they look.